
This is a documentation of creating an AWS account, setting up a Lightsail (one of the functions offered by AWS) resource, and installing multiple WordPress websites. I will be covering the following topics:
- Creating an AWS account and navigating through the dashboard of AWS
- Setting up Lightsail LAMP Linux instance and Statics IP
- Using SSH to connect to the terminal
- Setting server configuration for WordPress
- Installing WordPress
- Create SSL Certification using Let’s Encrypt
Creating AWS Account
First of all, you need an AWS account to get started Simply visit aws.amazon.com and click “Sign in to the Console”, then register a new account. To get the account active and be able to set up Lightsail, you fill in credit information for the account. It usually takes them overnight to verify the account. If longer than that, I suggest you contact them. For corporate account, they may need to call in and verify company information.
Once the account is verified, you can set up Lightsail as followed.
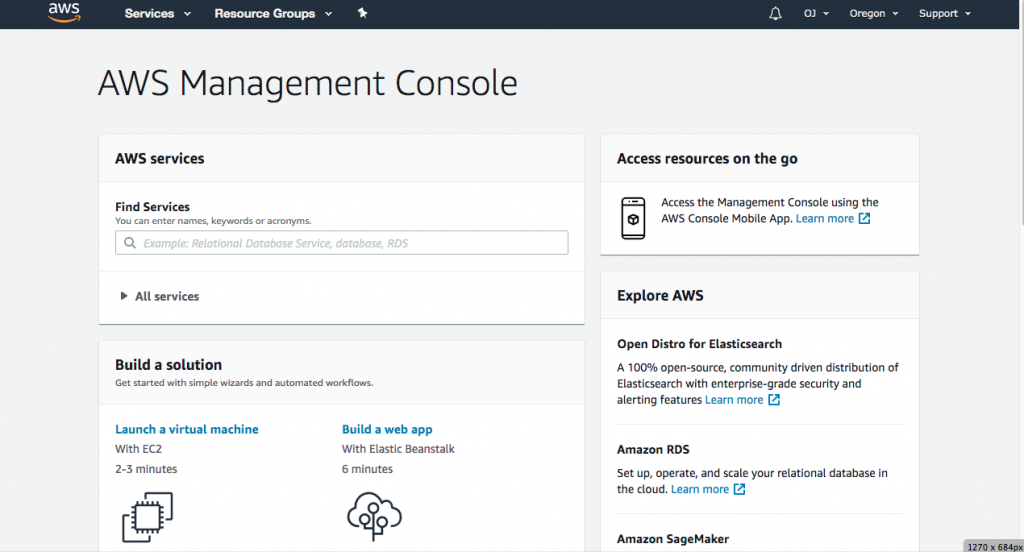
Click Services on the top bar and select Lightsail (usually on the first column). When you land on Lightsail page you will see something like this.
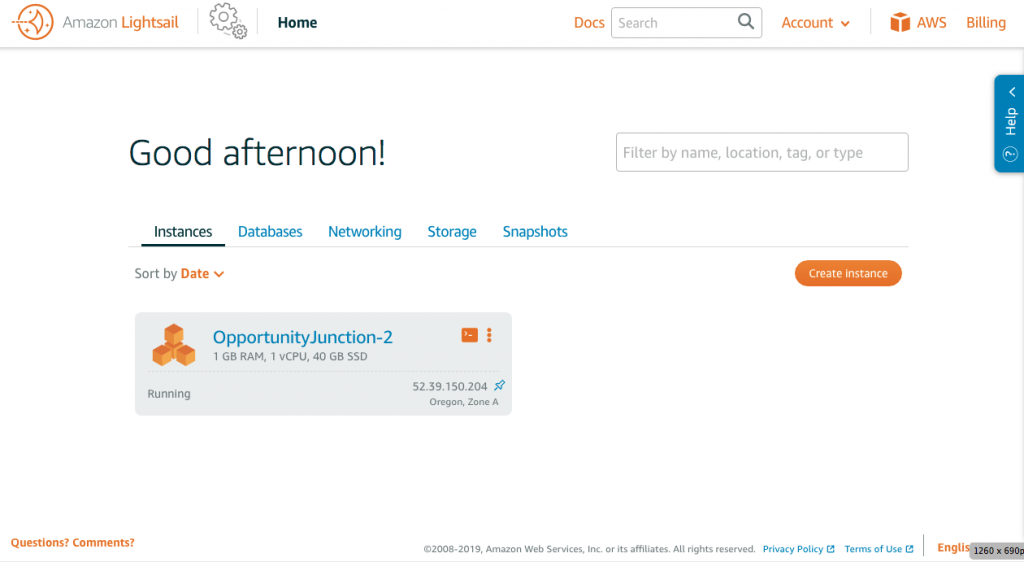
When you create an instance, here’s what you will see.
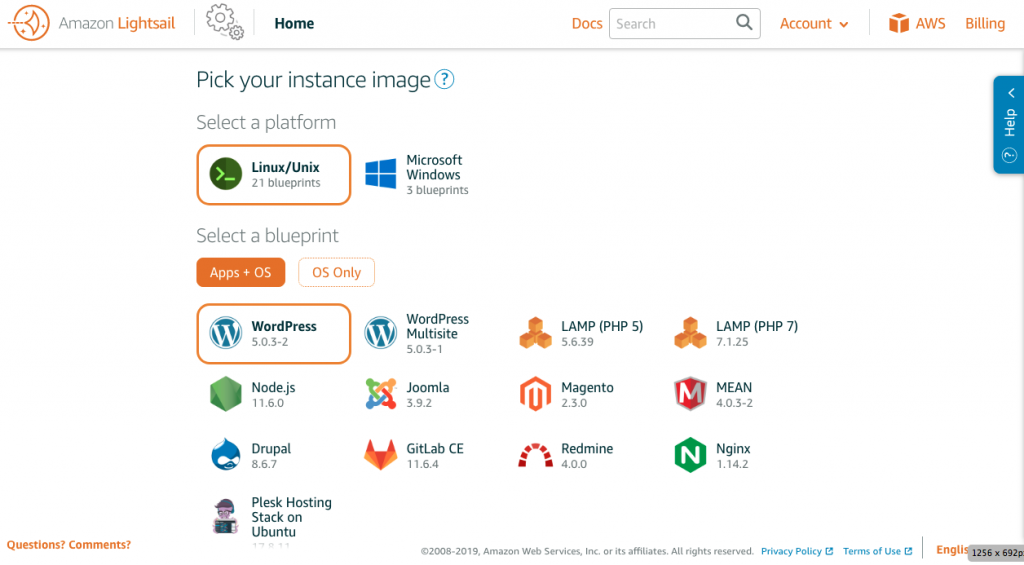
To create a stable multisite instance without purchasing expensive plugin (especially the All-in-one backup) to support WordPress Multisite, in this documentation, we will create a LAMP (PHP 7) to build from scratch. After choosing the image, you will be asked to choose a plan. After it’s done, you will see an instance showed up on your Lightsail dashboard.
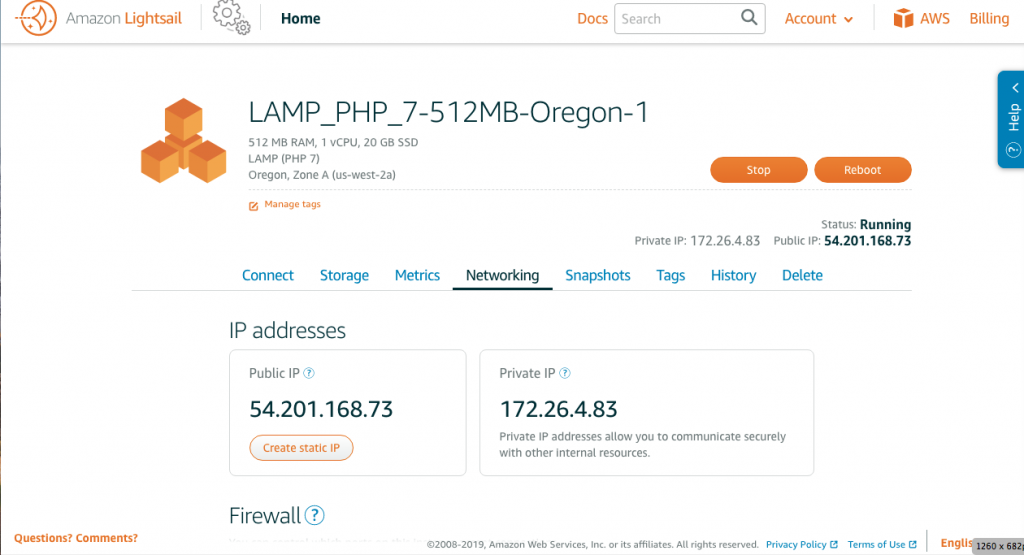
The first thing to do after creating a new instance is to attach a static IP. The IP given by AWS in your new created Lightsail is by default a floating IP.
Setting up Lightsail LAMP Linux instance and Statics IP
To attach a static IP, click the Networking tap on the instance dashboard.
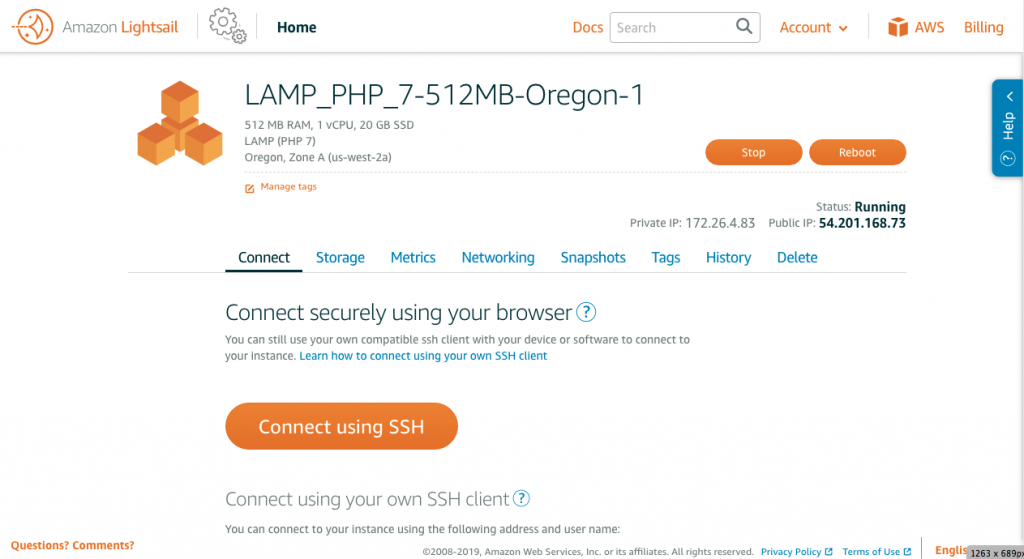
On the Networking page, hit Create a Static IP. Just follow the instruction, a statics IP can be created easily.
Now we need to connect to SSH terminal to perform some cool command line work. You can either use AWS website’s SSH portal (the Connect using SSH button on the previous picture) or use your own Command Prompt or Terminal.
If you connect using the later method, you need to download the SSH Key. To download it, click Account on the top bar, and click Account on the dropdown. Then, click SSH key and download it.
Use the following command to connect through SSH
ssh opportunityjunction.org(CAN USE IP AS WELL) -l bitnami -i PATH TO KEY FILEAfter logging in the instance, you will see this screen on your Terminal.
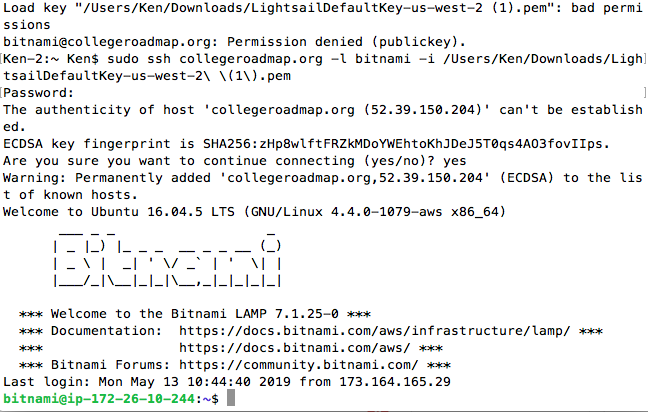
Now you can perform Linux commands to the instance.
For a new created instance, I usually perform a routine update before doing anything.
sudo apt update && sudo apt upgradeSetting server configuration for WordPress
When done, download wordpress and extract the package.
wget -c http://wordpress.org/latest.tar.gz
tar -xzvf latest.tar.gz
Now, you will get a wordpress file on your folder, if you perform the command.
lsNext, you need to move the wordpress folder to /apps/ , where Bitnami instance usually stores website folder. You may rename it if you want.
sudo mv wordpress /apps/wordpress_oppYou need to set up the correct profile permission for it to work
chown daemon:daemon -R ./wordpress_opp
chmod 755 -R ./wordpress_opp
As you see, we set the ownership of the wordpress file to daemon. That’s what the
Before we started the installation process, we also need to create a mysql database for WordPress.
You can find the password to login using the following commands.
cat ~/bitnami_credentialsLogin MySQL by typing the following commands:
mysql -u root -pThen, a prompt to enter password shows up, and enter the password you find in the previous step. In the MySQL console, create a database using the following SQL command.
CREATE DATABASE wordpress_opp;Remember the database name you use, because we need it for the installation of wordpress, as well as the MySQL password. You can exit the MySQL concole using:
exitNow, we are one step away from actually installing WordPress. We need to configure Apache2, the server software and make it point to our WordPress folder.
cd /opt/bitnami/apache2/conf/bitnamiThis is where the configureation file locates. Then open the file using Vim editor.
sudo vim bitnami.confPress i to start editing. Find a block that is embraced by <VirtualHost _default_:80> and </VirtualHost>. For example, something like that:
<VirtualHost _default_:80>
   ServerName collegeroadmap.org
   DocumentRoot "/opt/bitnami/apps/wordpress_opp/"
  <Directory "/opt/bitnami/apps/wordpress_opp/">
    Options Indexes FollowSymLinks
    AllowOverride All
    <IfVersion < 2.3 >
      Order allow,deny
      Allow from all
    </IfVersion>
    <IfVersion >= 2.3 >
      Require all granted
    </IfVersion>
  </Directory>
  # Error Documents
  ErrorDocument 503 /503.html

  # Bitnami applications installed with a prefix URL (default)
  #Include "/opt/bitnami/apache2/conf/bitnami/bitnami-apps-prefix.conf"
</VirtualHost>
Change the path next to DocumentRoot and Directory to the path of the target WordPress folder. And comment out the “Include …” line near the bottom.
When you need to create a second/third/… site, you just need to copy and paste a new <VirtualHost> block and change the path to the right folder.
Type :w to save the file, and type :q to quit the Vim editor. Just restart the server before you are going to isntall.
sudo /opt/bitnami/ctlscript.sh restartInstalling WordPress
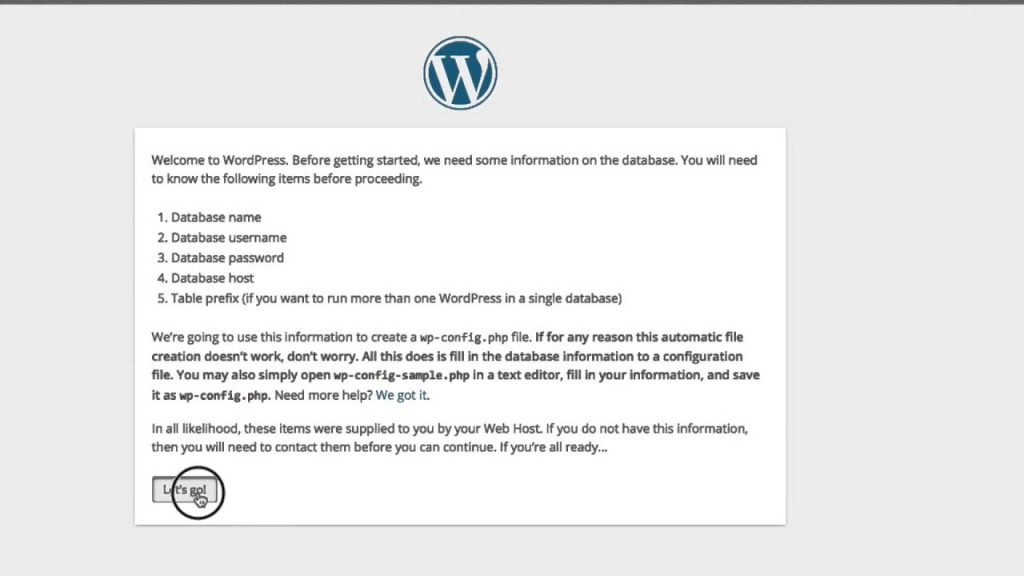
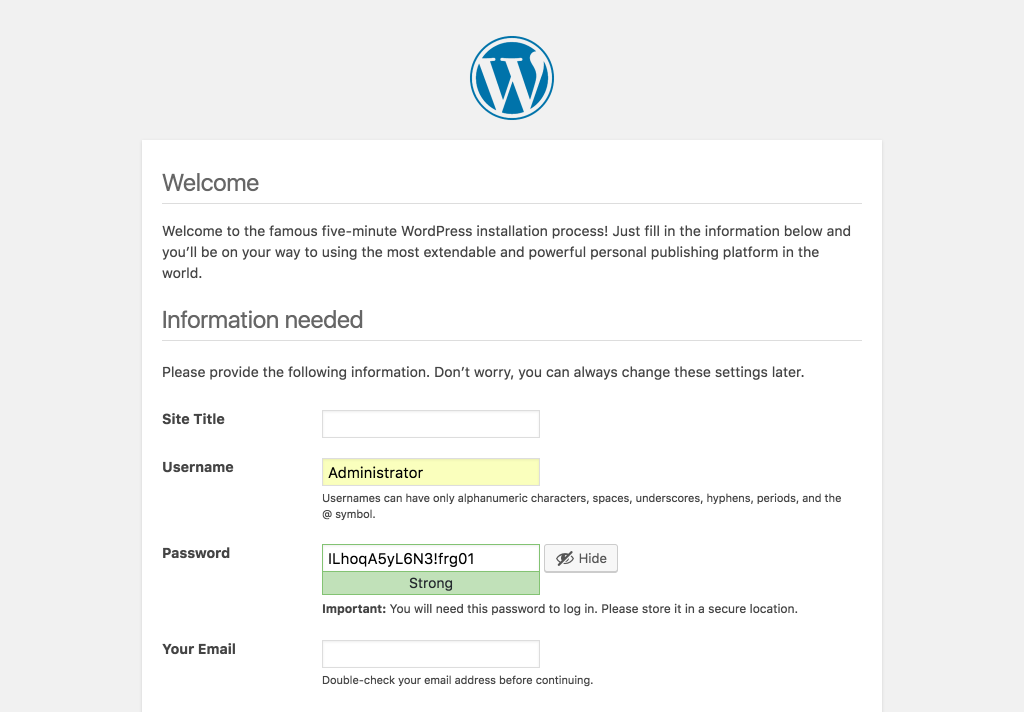
Visit the ip address or the URL (if you have pointed to the ip) of the server on the browser. If everything goes right, you will see the installation page. You just need to follow the instruction. During the process, you will need the MySQL database password and the name of the database you created.
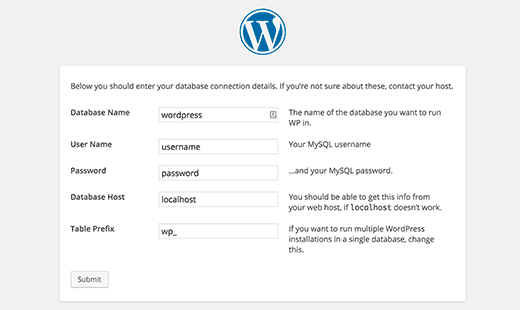
On the above page, MySQL username is root, Database Host is localhost.
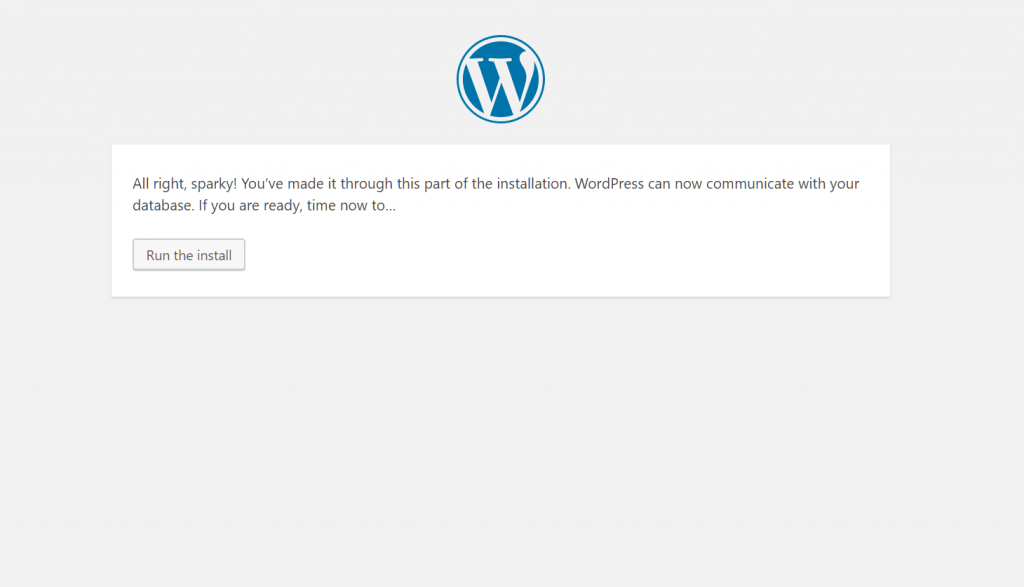
Wow, you made it! A new WordPress site has been installed. When you want to install a different site, just repeat the steps with a different folder name and database name.
Create SSL Certification using Let’s Encrypt
First, you need to stop apache2.
sudo /opt/bitnami/ctlscript.sh stopThen, run this command to create the certificate to the default folder (or the one you chose).
sudo lego --tls --email="EMAIL-ADDRESS" --domains="DOMAIN" --domains="www.DOMAIN" --path="/etc/lego" runAt the same time, make sure to add these two lines to the apache2 config file that tells it where’s the certificate files.
SSLCertificateFile /etc/lego/certificates/xxxx.com.crt
SSLCertificateKeyFile /etc/lego/certificates/xxxx.com.key
Last, it’s to set up a routine to periodically renew the certificate. You can create a bash file (.sh) and set up a cron job for it.
#!/bin/bash
PATH=/usr/local/sbin:/usr/local/bin:/usr/sbin:/usr/bin:/sbin:/bin:/etc/lego/

sudo /opt/bitnami/ctlscript.sh stop apache
sudo /usr/local/bin/lego --tls --email='xxx' --domains='xxx.com'  --domains="www.xxxx.com" --path="/etc/lego" renew

echo "lego done"
sudo certbot --apache certonly -n -d mail.xxx.com
sudo certbot --apache certonly -n -d xxx.com

sudo cp /etc/lego/certificates/xxx.com.crt /home/bitnami/somewhere/server.crt
sudo cp /etc/lego/certificates/xxx.com.key /home/bitnami/somewhere/server.key

#sudo reboot
sudo /opt/bitnami/ctlscript.sh start apache
In the process there’re 3 and optionally 4 steps:
- Stop the Apache process
- Execute the renewal process
- (optional) move the certicate to wherever needed
- Start the Apache process
Setup SSL 443 Port in Apache Config
You need to add the following block to the apache config file.
<VirtualHost *:443>
  ServerName xxx.com
  ServerAlias www.xxx.com
  DocumentRoot "/opt/bitnami/abc/xxx"
  SSLEngine on
  <Directory "/opt/bitnami/abc/xxx">
    Options Indexes FollowSymLinks
    AllowOverride All
    <IfVersion < 2.3 >
Order allow,deny
Allow from all
    </IfVersion>
    <IfVersion >= 2.3 >
Require all granted
    </IfVersion>
  </Directory>

Include "/opt/bitnami/apache2/conf/bitnami/bitnami-apps-prefix.conf"
  Include /etc/letsencrypt/options-ssl-apache.conf
SSLCertificateFile /etc/letsencrypt/live/xxx.com/fullchain.pem
SSLCertificateKeyFile /etc/letsencrypt/live/xxx.com/privkey.pem
</VirtualHost>
This block will tell the apache proxy where to look for the certificate file and what server name/alias to server. If you have set up a rewrite rule to route all HTTP to HTTPS. You can detele the :80 virtual host block mentioned above as well.