

Introduction of CuDF
CuDF is a powerful tool in the era of big data. It utilizes GPU computing framework Cuda to speed up data ETL and offers a Pandas-like interface. The tool is developed by the team, RapidAI.
You can check out their Git repo here.
I love the tool. It gives me a way to make full use of my expensive graphic card, which most of the time only used for gaming. Most importantly, for a company like Owler, which has to handle 14 millions+ company profiles, even a basic data transformation task might take days. This tool is possible to help speed up the process by about 80+ times. GPU computing has been a norm for ML/AL. CuDF makes it also good for the upper stream of the flow, the ETL. And ETL is in high demand for almost every company with digital capacity in the world.
The Challenges
It’s nice to have this tool for our day-to-day data work. However, the convenience comes at a cost. That is, the installation of CuDF is quite confusing and hard to follow. It also has some limitations in OS and Python versions. Currently, it only works with Linux and Python 3.7+. And it only provides a condo-forge way to install; otherwise, you need to build from the source.
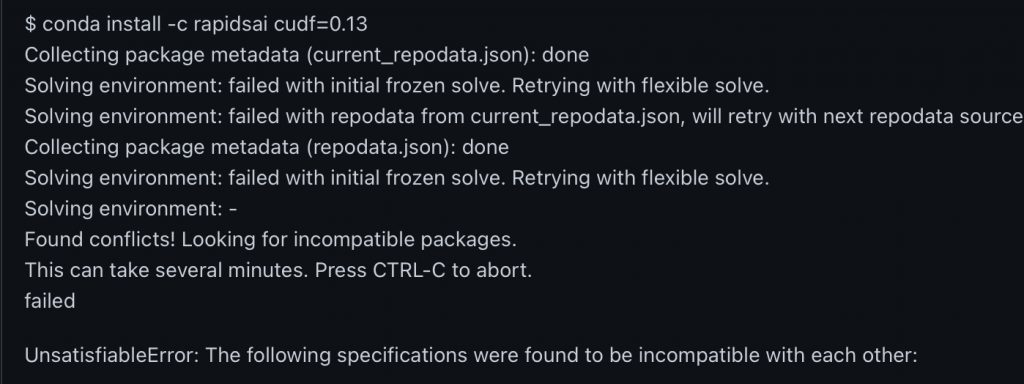
The errors range from solving environment fail, dependencies conflict, inability to find GPU, and such. I have been installing CuDF into a couple of servers, including personal desktop, AWS, and so on. Each time, I have to spend hours dealing with multiple kinds of errors and try them again and again. When it finally works, I don’t know which one is the critical step because there were so many variables. Most ugly, when you have dependency conflict error, you have to wait for a very long time after 4 solving environment attempts until it displays the conflicting package for you.
But the good news is, from the most recent installation, I can finally understand the cause for the complication and summarize an easy to follow guide for anyone who wants to enjoy this tool.
In short, the key is, use miniconda or create a new environment in anaconda to install.
Let me walk through the steps.
Installing the Nvidia Cuda framework (Ubuntu)
Installing Cuda is simple when you have the right machine. You can follow the guide here from Nvidia official webpage. If you encounter an installation error, please check if you are selecting the right architecture and meet the hardware/driver requirements.
However, if you have an older version of Cuda installed and wish to upgrade that. The Nvidia guide won’t help you anyway. The correct way is to uninstall the older version Cuda first before doing anything from the guide. The reason is that, at least in Ubuntu, the installation step will change your apt-get source library; once you do that, you will no longer be able to uninstall the older version, and it may cause conflict.
To uninstall Cuda, you can try the following steps. (for Ubuntu)
- Remove nvidia-cuda-toolkit
sudo apt-get remove nvidia-cuda-toolkitYou may want to use this command instead to remove all the dependencies as well.
sudo apt-get remove --auto-remove nvidia-cuda-toolkit- Remove Cuda
sudo apt-get remove cudaIf you forgot to remove the older version cuda before installing the new version, you would need to remove all dependencies for cuda and start over the new version installation.
sudo apt-get remove --auto-remove cuda- Install cuda by following the Nvidia official guide. Link above.
Install CuDF
I highly recommend installing CuDF in miniconda. This will avoid most of the package dependency conflicts. If you have dependency conflicts, you will probably get the below error. Or you will be waiting forever during the last solving environment step.
Miniconda is a much cleaner version of Anaconda. It has very few packages installed out of box. So it will avoid the CuDF installation running into conflict.
If you already have Anaconda installed and wish to keep it. You can try creating a new condo environment with no default package for CuDF.
conda create --no-default-packages -n myenv python=3.7